I got married last week and it was absolutely incredible. There was so much joy and love in the room, and I got to experience it all in my hand-made wedding dress. Now that we know that the story has a happy ending, I’m so excited to start sharing the journey of making my dress!
I started the design process in March 2024, which gave me about 16 months to complete the project. My starting point was trying on dresses in a shop, which was incredibly helpful because you don’t know how you really feel in a dress until it is on your body. I booked an appointment in London and went with my mum and two maids of honour.
I tried on 4 dresses in total – I’m not sure if that’s a lot or little but it gave me a good idea of what I wanted.

I’ve seen enough SYTTD to know the lingo here, and a big question for me was A-line vs fit-and-flare. I had picked out #1-#3 online to try and #4 was one that we found while browsing.
The first dress was a great start. The skirt was lovely and the low V-back was an immediate hit with my entourage. However, when I tried on dress #2 it became clear to me that I wanted something more fitted. There are so many layers to wedding dresses and at 159 cm I felt like the A-line skirts were swallowing me up…
Dress #3 was my least favourite, which was ironic because I thought I would like that one the most. However the off-shoulder straps really impede arm movement and I didn’t like how the back made my shoulders look at all.
Then came dress #4. I would never have picked out a square-neck dress for myself but I was immediately in love. I loved the sparkle it had from top to bottom and how delicate the straps were. There were also elements I wasn’t so keen on, such as the sheer panels on the back and skirt, but of course I’d be able to change that for myself.
A debrief in a cafe after the appointment resulted in a unanimous decision – the front of dress #4 and the back of dress #2:

A side note: Comparing dress #2 online with the photo of me in it, it is also funny how different the back looks. Whereas the actual dress has a scooped back, the way that it was pinned on me gave it a more pronounced V, which is exactly what I loved!
Drafting the bodice
Following a successful dress day, I felt very lucky knowing exactly what I wanted – that doesn’t always come easily to me. To turn my vision into a reality, I started by drafting a “moulage”. This is a zero ease bodice template, a starting point for almost any design.
I wanted the bodice of the dress to be a perfect close fit and there are two ways to end up there – either you start with the style (aka an existing pattern) and grade/adjust the pattern for the perfect fit; or you start with the fit and then add your style lines. I opted for the latter. I honestly love the process of creating a perfectly-fitting template, and the best part is that you can also use it for other projects. I used Suzy Furrer’s class on Craftsy called “Pattern Making Basics: The Bodice Sloper” to draft my bodice template. I have found that that Suzy’s method gives me a good starting point but it should be used in tandem with other resources on bodice fit.
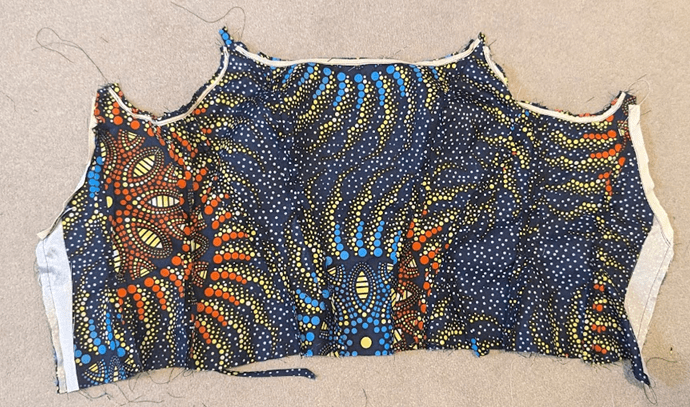
After about 3 versions of the bodice moulage, I landed on a pattern that fit like a glove. This pattern has a princess seam on both the front and back, but the darts can be manipulated later to create the style lines I want. I used heat erasable markers to draw the shape of the bodice and transferred that onto my graphic design program.

The initial design pictured above was version 2 of the bodice. It was already a pretty good fit, yet I would eventually end up with 14 versions of the bodice… To my great surprise, the process of trial and error did in fact involve error. This is best shown in graphic form, which my happiness with each version plotted over time:


Version 3 was a real low point and I can’t even remember what happened between version 4 and 8… There were two main elements that I struggled with:
Problem #1: Underwired bra cups vs flat CF seam
My inspiration dress was a bustier style bodice with bra cups. However, the wedding dress shop only has standard sizes so the bra cups of the dress I tried were a bit small. This had the effect of flattening my chest and once I drafted a truly fitting bustier style, it looked much more busty that I wanted.
Eventually I realised that having the fabric go straight across the chest didn’t look as “uni-booby” as I initialy feared, and I loved the look of princess seams instead.
Problem #2: Maintaining support with a low V-back

Whenever you break a horizontal loop in a design, you lose support. This is why most designs requiring bust support will have a fairly high back, or sheer illusion panels as to not break the support loop. The other problem with a V-back is that the fabric there will be cut on the bias, which naturally likes to stretch. This caused me a lot of trouble with gaping in the back.
I found two solutions during the toile process that were integral to the support of the design and therefore necessary to install in toile:
- Boning: I used spiral steel boning which allowed me to extend the support from the “support lines” vertically up to the bust. Either I inserted boning directly in the toile or wore a bra underneath.
- Stay tape: I stability all curved and bias-cut style lines with a non-stretch twill tape. This stopped the V-back from stretching out.


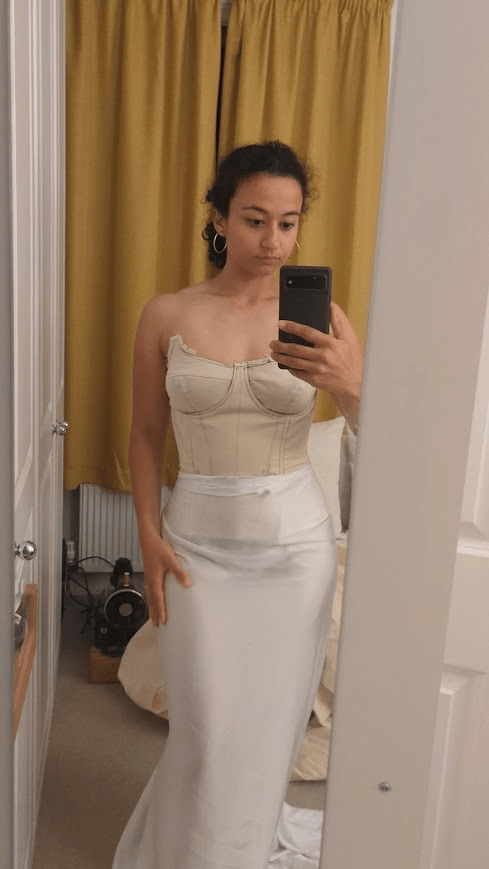
The final toile of the bodice felt so comfortable to wear and fit absolutely perfectly. Initially I had drafted a bustier corselette to go on the inside, but I decided that using the same pattern for the corselette would allow me to join it along the neckline. Despite the difficulties I faced during the design process, the final bodice design gave me the confidence that it would all work out.
The next post will be about designing the skirt (which thankfully was much less of a headache) and doing a “final toile” of the dress before locking in the design..!

Leave a comment