Designing the skirt
The skirt thankfully required way fewer versions than the bodice. Again I started with a moulage and experimented with different amount of volume for the “flare” part of the skirt. I also had to shift at what point the skirt starts to flare, which was lower than I initially drafted.
The skirt was cut on-grain and to be sewn out of a non-stretch fabric. This meant I had to add some extra ease in order to be able to move and sit in it. The reason I went for an on-grain pattern as opposed to a bias-cut skirt is that (1) I was joining the skirt to a very stable, on-grain bodice and (2) because the pattern on the lace layer would definitely have to be cut on-grain. The design worked well in the end but I would definitely recommend having at least 5 seams in the skirt (CB, x2 back and x2 side) in order to get a good fit.
What surprised me while designing the skirt is that I preferred less volume in the flare than I initially thought. Most of the flare is at the back so I reduced the front from 3 panels to 1, with darts for waist shaping. This makes the front closer to a column dress than a true fit-and-flare. The drama would come from the sequinned lace as opposed to a dramatic sillhouette.

The final toile
The hardest part about design is knowing when to stop. I had set myself a deadline to finish the pattern by the end of the year such that I could start on the real dress in January.
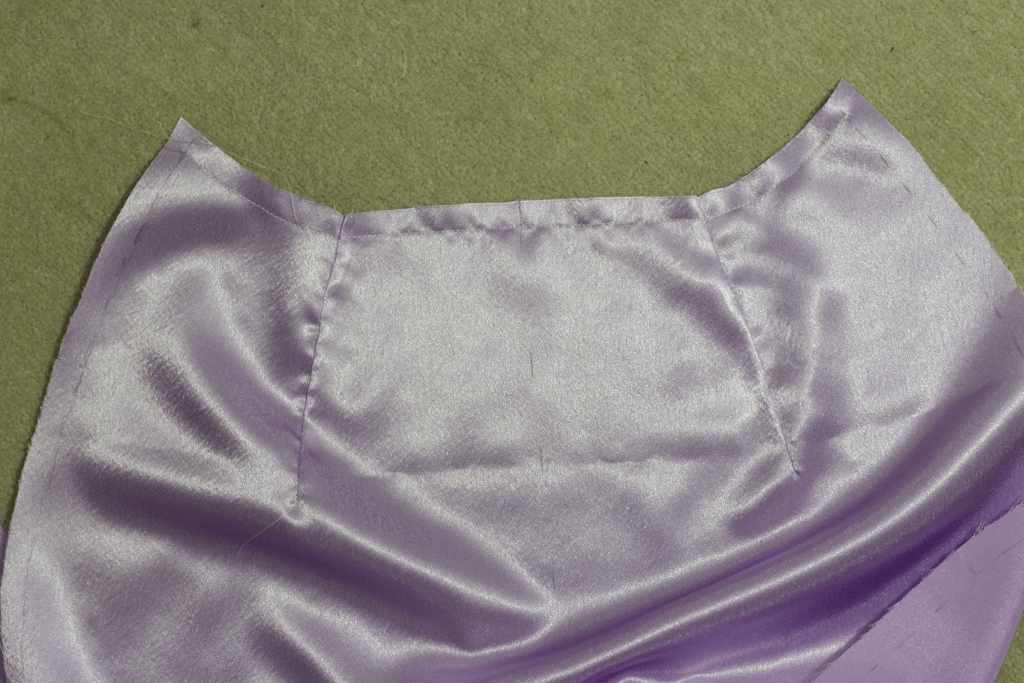
The final toile consisted of one skirt layer, a boned corselette layer, and an underlined outer layer. I used the cheapest satin I could find, which happened to be lilac, and used a polyester organza for the underlining. Polyester organza is much cheaper than silk (good for a toile) but I must say that real silk organza is far better to work with.
Given this was the final toile, I took my time to make it as accurate as possible. I honed in on a cutting method:
- Project the pattern onto the fabric
- Double-check the size of the projected pattern!
- Use a heat-eraseable pen to mark the stitch line and seam allowances with a dotted line (this doesn’t warp the fabric as you mark it)
- Cut the piece
- Hand-baste around the edge
Each seam was hand-basted, and I learned that on curved seams it helps to (1) used a short stitch length and (2) do a little back-stitch every so often. This is because the running stitch still allows the fabric to slide a little, especially if you’re dealing with slippery satin.
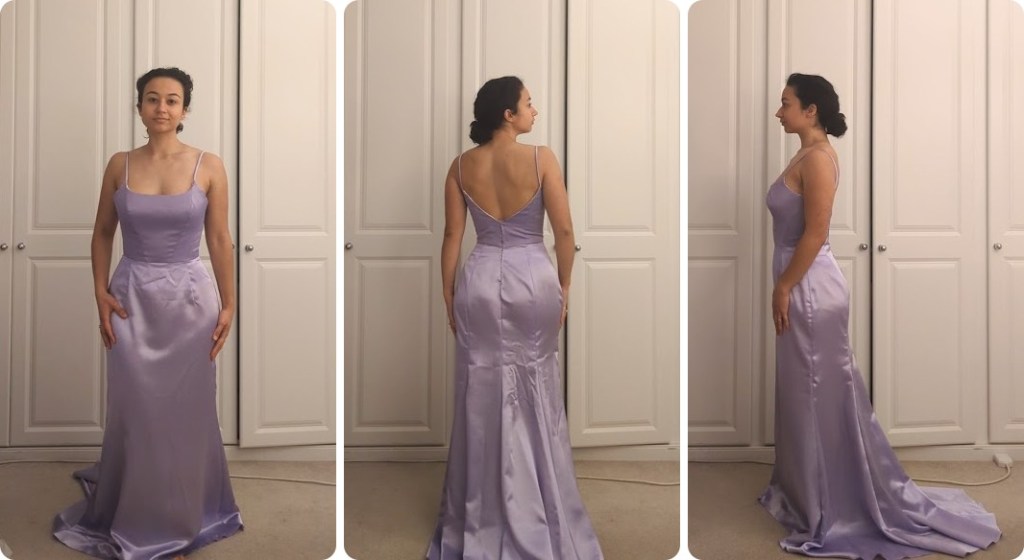
I finished the final toile on 31st December – just making my deadline – and it only needed a very minor alteration to the side seam curve on the skirt. I was ecstatic at the fit and despite it being lilac it was the first time that it felt like my wedding dress.
Writing the construction method
While designing the pattern, I simultaneously worked on a construction document with all the advice I had collected from books, blogs and my own experience sewing the toiles. I wrote down each step and added little reminders, such as remembering to change the needle when switching between fabrics!
Figuring out how to attach the corselette to the bodice was the most difficult part. There are not that many detailed photos of the insides of couture dresses online, but I found a few that gave me ideas:


The corselette could be loosely tacked to the bodice or joined along the top. If I had made a bustier-style corset I would have definitely have kept it loose, but given my corselette was the same shape as the bodice I went for a top-join. This is similar to the light pink Dior garment in the photo.

Designing the dress and visualising the construction method occupied most of my thoughts in the autumn of 2024. I would lie in bed seeing pattern pieces fly around. I would try to account for each raw seam while cycling in the the gym. It was a delicious mental puzzle that I eventually consolidated in diagrams and lists and sewing instructions (can you tell I’m type a?). By the time we were ringing in the new year, I was ready to sink my teeth into the real thing.

Leave a comment