The design
One of the most exciting parts of this project was creating the inner structure of the dress. I’m an engineer so the mechanics of sewing have always fascinated me and I knew that the structure of this dress was something I could seriously nerd out over.
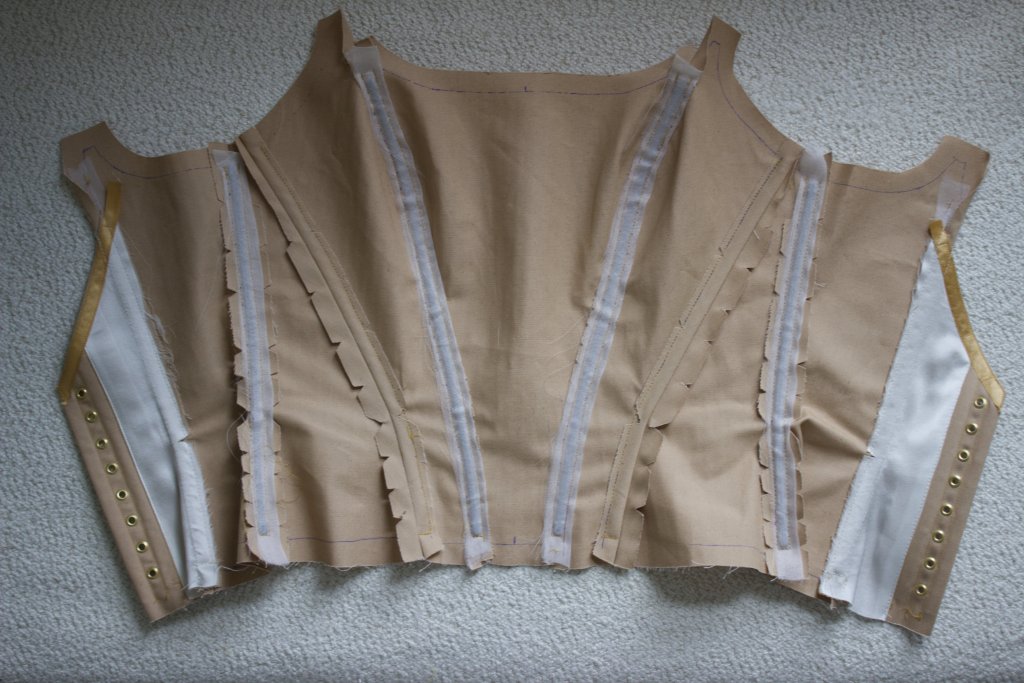
The inner corselette was the most important part of the dress. It allows everything to be structurally anchored to the waist; the skirt hangs from it and the bodice stands up from it. The shape of my corselette mirrored that of the outer bodice, with just two differences:
- The CB pieces were a little narrower to allow for a laced up back
- The corselette extended beyond the waist to the hips
The latter was a tip I picked up from Kat Makes, who wished that her corselette had been longer. She was right; my hip level corselette honestly felt incredible – like a big hug – and it also reduced the amount of waist-seam bulk! Of course, I ran into other issues… but more on that later.
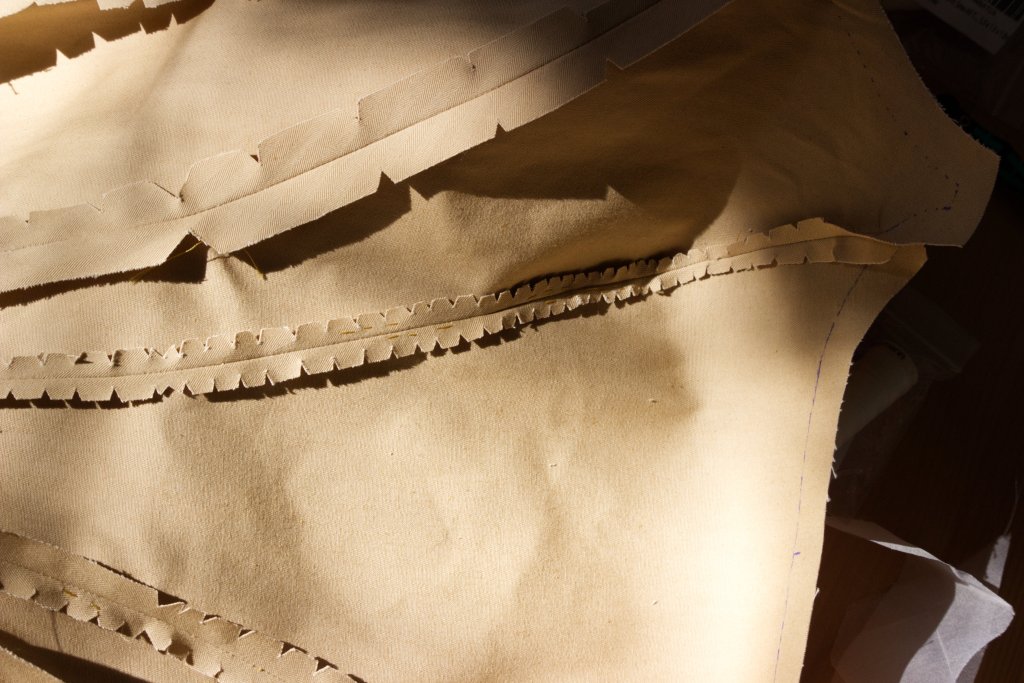
Starting the real thing was nerve-wrecking so I was thankful to start with a stable cotton, where I feel most at home! The fabric was cotton coutil, a common corsetry fabric. Natural fibres kept the bodice very breathable on the day.
I projected my pattern pieces and marked them up with a heat-erasable dotted line. I found that little dots were best for marking the stitch line as it doesn’t drag the fabric out of place. All my seams were hand-basted first, especially the princess seams. Whereas a running stitch is usually used for basting, I found that an occasional backstitch was critical so stick the fabric sliding around. Then I used a short machine stitch on the old Singer given to my by my husband’s nana. This old, stable machine did a fantastic job and it a beautiful humming sound as it stitches. I trimmed and clipped the curved seams as often as needed. Clipping the princess seam shallow and often helped maintain a smooth finish.
Installing the eyelets
Next I installed the eyelets, probably the most fun part of the process. I used a belt hole puncher to make the holes, sealed the holes with fabric glue, and then pressed in the eyelets. My tips are:
- Get good quality eyelets that curl over evenly instead of leaving sharp corners
- Do a test run first to check the size of the hole is right and the eyelets feel secure. It is hard to remove them after they are installed
- Push the “barrel” part of the eyelet from the inner part of the corsellet. That way the continuous, smooth side of the eyelet will sit against your skin
The boning
Next came the boning channels. Now I actually ended up making the corselette twice – more on that later – so I ended up using polyester boning channels for the first corselette and organza strips for the second. The organza strips worked much better as they are super light and strong. I used a double layer of organza and made sure that the width would comfortably contain the boning; you want it to be snug but not so tight that the boning starts to protrude (for me this was 9-10mm for 8mm boning).

I used spiral steel boning in all my seams apart from the boning on either side of the CB eyelets. For those I used rigilene. I bought continuous spiral steel that I trimmed to size, capped with metal caps and sealed off with nail varnish. Some people use electrical tape to seal the boning, which I’ve heard worked well, but I personally just didn’t like the idea of putting plastic caps into my dress. The metal caps can be bulky though, so I made sure to end the boning channel about 10mm from the stitch line to smooth things out.
The last part of the corselette was binding the bottom edge. I used a hand-overcasting stitch for minimal bulk and although it may not be the most prestine finish, it was a lovely slow task to do and functionally worked incredibly well.
Making the corselette was honestly my favourite part to make, and my favourite part of the final dress. Anybody who tells you that corsets are uncomfortable doesn’t really know what a corset can be. I also loved that this corselette was something that nobody would even see; it was a piece of the dress that I made just for myself and it gave me comfort and security throughout the wedding day.


Leave a comment