Drafting a pair of well-fitting jeans starts from a well-fitting “trouser template” – or “sloper”.
A good pair of jeans can last a lifetime, which is thanks in part to flat-felled seams. Using multiple rows of stitches, flat-felled seams are strong, but also very annoying to unpick. So it’s a lot more efficient to check the fit of your jeans before cutting up your denim!
There are three ways to develop a trouser template:
- Find a simple trouser pattern that looks like a good basic block. This means the pattern should have:
- a simple design, which in my opinion means no more than 1 front piece and 2 back pieces (the back might have one back piece and one back yoke)
- a straight leg silhouette and fitted waist
- a high waist, if you are planning to make high-waisted jeans
- Draft a trouser sloper using your own measurements – this is what I did. This method takes the longest, but it gives you a very good understanding of the trouser block.
- I would highly recommend the online course “Patternmaking + Design: The Pants Sloper” by Suzy Furrer. Find it here on Craftsy.
- You can purchase a custom block based on your measurements from Pattern Lab. Note: I have not used them myself yet, but I think a custom block would be a good starting point for a sloper. You will likely still have to make adjustments. Also note that the method used to create a sloper vary, and some will work better for your body type than others.
- There are also plenty of free pattern-making courses on Youtube
- Pay a tailor or seamstress to make a custom trouser sloper. This can be a great way to get a perfect fit on your basic block, and it is not cheating! Later on, we will be adding in our own design details anyway, so you may want to skip some of the fitting parts so that you can get designing.
Toile Time

If you are using using methods 1 or 2, you will probably need to make a few toiles (mock-ups). I think that this is actually the hardest part of sewing jeans, so put on a good show/music and take your time 🙂
Having said that, I have a few tips to make the process easier. Essentially you want to maximise the number of adjustments that you can make to each toile so that you minimise the time cutting up new fabric!
1
Make your first pattern a little bigger than you think will fit.
It’s much easier to take away fabric than to add it back.
2
Give yourself lots of seam allowance – at least 2 cm.
Seam allowance gives you the flexibility to make adjustments. This is particularly important with the crotch curve, where both the length and the shape of the curve will influence the fit.
3
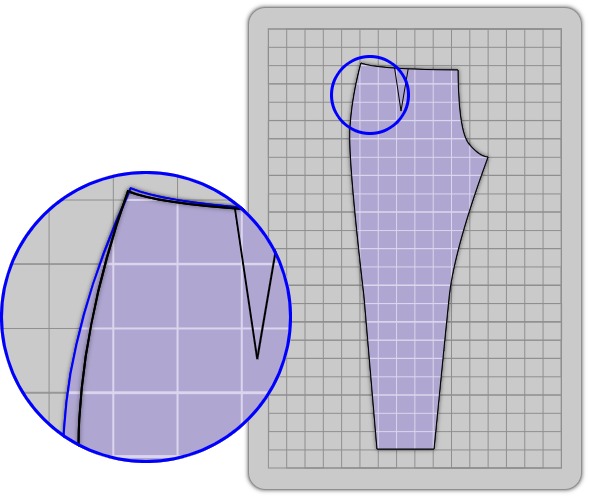
Draw a grid on your pattern and transfer to the fabric.
This makes it easy to transfer your adjustments to the pattern by comparing your markings to the grid. I especially like this technique because if your toile fabric warps during fitting, the grid will warp too – so you can still see where your adjusted lines are supposed to be.
4
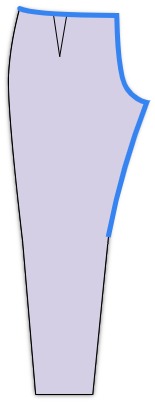
Stay-stitch any curved areas.
These are the areas where your pattern is on the bias – for example the waistband and near the crotch line. Areas on the bias have stretch and are therefore most likely to warp when you try the trouser on. Stay-stitching helps to keep your pattern more accurate as you try it on and make adjustments.
5
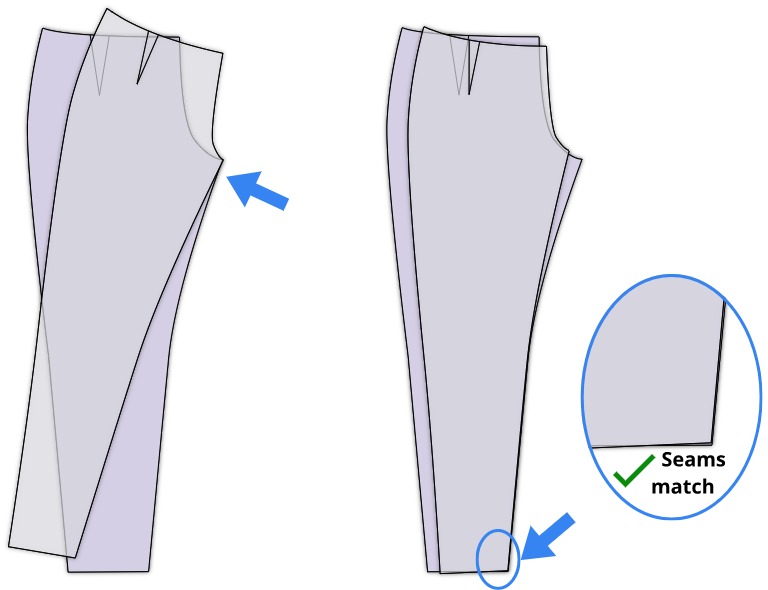
Always true your seams.
“Truing” your seams means making sure that your seams are the same length – so that you don’t end up with your ends not matching. True the seams by tracing one of your pattern pieces over the other and checking that the length matches. Also make sure that there is a smooth transition between the pieces (i.e. no sharp corners where the seams meet).
Trouser fitting resources
I’m can’t give a detailed trouser fitting guide as I only know what adjustments I had to make! However, these are the resources I used (ones with pictures are always my favourite!).
